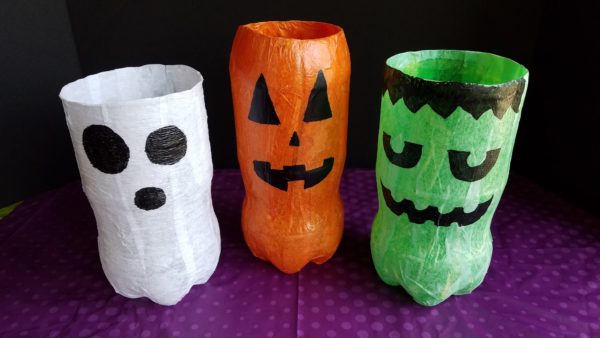
What to do with all of your empty Coca-Cola 2-liter bottles? How to get some fun, festive Halloween lights that aren’t pumpkin-based? The answer to both questions: make Halloween-inspired luminaries. These lamps are great decorations for tables and windowsills, or outside in dry weather. They will spookify any Halloween party, but they are definitely child friendly. Don’t know how to empty your bottles? Check back for some delightfully creepy Coca-Cola product treats.
Materials
- Green, white, and orange tissue paper or crepe paper if you want texture
- Black paint marker
- Mod-Podge
- Foam brushes (helps to have big and small)
- Empty 2-liter bottles (clear bottles, like Coke or Barq’s Root Beer work for all designs; green bottles, like Sprite or Mello Yello, work well for luminary characters with green faces)
- Small battery-operated candles (real ones work too, but be really careful)
- Sharp knife
- Beans/Rice/Sand (optional)
- Plastic bowls
Instructions
- Empty your bottles. Remove labels. Rinse and allow to dry.
- Use your knife to cut the bottles near the top. Cut far enough down to leave a large opening. BE CAREFUL! (Kids should get an adult’s help for this step.)
- Tear your tissue paper/crepe paper into strips a little longer than the cut bottle
- Put a small amount of Mod-Podge into a plastic bowl (add more Mod-Podge if you run out at any point).
- Using a foam brush, coat a section a little wider than one of your tissue/crepe strips in Mod-Podge.
- Place the paper strip on the Mod-Podge and press lightly to make sure there are no trapped air bubbles. Be sure to wrap the paper strips over the lip at the top of the bottle.
- Repeat steps five and six all the way around the bottle, leaving no plastic showing.
- Allow to dry. Depending on how much glue you have used, the drying process could take several hours.
- Really thin tissue paper will probably need a second coat. More than two coats will make the luminary too opaque and won’t let the light glow.
- When the bottles are completely dry, it’s time to start on the faces. Sketch out ideas for the faces on paper before you start on the luminaries.
- Once you know what design you want, use your paint marker to make light layers of color. You want to use thin layers so the paint doesn’t drip.
- After the paint and Mod Podge have completely dried, place a couple of inches of dried beans, rice, or sand in the bottom of the luminary (helps with stability and gives the candle a level base. Put in your candle
- Now you have an awesome Halloween decoration for your next spooky shin-dig!